Pipeline Jobs
If you already have some Jobs in your Jenkins CI Server or you want to create a new one, you might want to add the capabilities of ElasTest to get a greater amount of data from their executions and at the same time have the tools provided by elastest to ease their analysis. To do that, just have to wrap your main pipeline code with the elastest step.
node {
    elastest() {
        ...The pipeline code...
    }
}
NOTE: You can find more information about how integrate your current Jobs with ElasTest using the ElasTest plugin, below in this document.
This step provides your pipeline with the following capabilities:
- Send the
logsgenerated by a build to ElasTest. - Ask ElasTest for the
browsersrequired by the tests executed during a build. The session of these browsers will be stored on ElasTest. - Monitoring docker services (send
logs and metricsto ElasTest), such as dockerized Sut, started during a build from a pipeline. - Associate a TJob to an existing project on ElasTest or to a new project with the name provided.
- Ask ElasTest for a SUT managed by ElasTest (this SUT can be deployed by ElasTest or not)
- Send the test results report to ElasTest.
Let's see how to create some examples of Jenkins Job that use the plugin. If you are using the Jenkins integrated in ElasTest, these examples are loaded by default and you will be able to run them directly without having to create them, but let's see their configurations to understand how to use the plugin.
Unit Test
This Job will run the demo example JUnit5 Unit Test, which has a single class with two methods, sum and sub, that receive two numerical values to add or subtract respectively. This test has been developed in Java using JUnit5. The code of this project is explained in detail here
The Jenkins Pipeline code that will contain the Job is as follows:
node{
    elastest(surefireReportsPattern: '**/target/surefire-reports/TEST-*.xml', project: 'Jenkins Examples') {
        stage ('Executing Test') {
            echo 'Set up test environment'
            mvnHome = tool 'M3.3.9'
            echo 'Cloning repository'
            git 'https://github.com/elastest/demo-projects'
            echo 'Run test'
            sh "cd ./unit/junit5-unit-test;'${mvnHome}/bin/mvn' -B -DforkCount=0 test"
            step([$class: 'JUnitResultArchiver', testResults: '**/target/surefire-reports/TEST-*.xml'])
        }
    }
}
The code above can be split into the following sections:
- ElasTest plugin block with configuration : this block will contain all the steps that the test must follow, as well as the necessary configuration options.
node{
    elastest(surefireReportsPattern: '**/target/surefire-reports/TEST-*.xml', project: 'Jenkins Examples') {
        .......
    }
}
- Test Execution : Basically the following steps are followed:
- The GitHub repository containing the tests is cloned.
git 'https://github.com/elastest/demo-projects' - You access the folder containing the tests:
cd ./unit/junit5-unit-test - The tests are executed:
'${mvnHome}/bin/mvn' -B -DforkCount=0 test
- The GitHub repository containing the tests is cloned.
....
stage ('Executing Test') {
        echo 'Set up test environment'
        mvnHome = tool 'M3.3.9'
        echo 'Cloning repository'
        git 'https://github.com/elastest/demo-projects'
        echo 'Run test'
        sh "cd ./unit/junit5-unit-test;'${mvnHome}/bin/mvn' -B -DforkCount=0 test"
        step([$class: 'JUnitResultArchiver', testResults: '**/target/surefire-reports/TEST-*.xml'])
}
....
* This example will only work if the Maven tool is configured
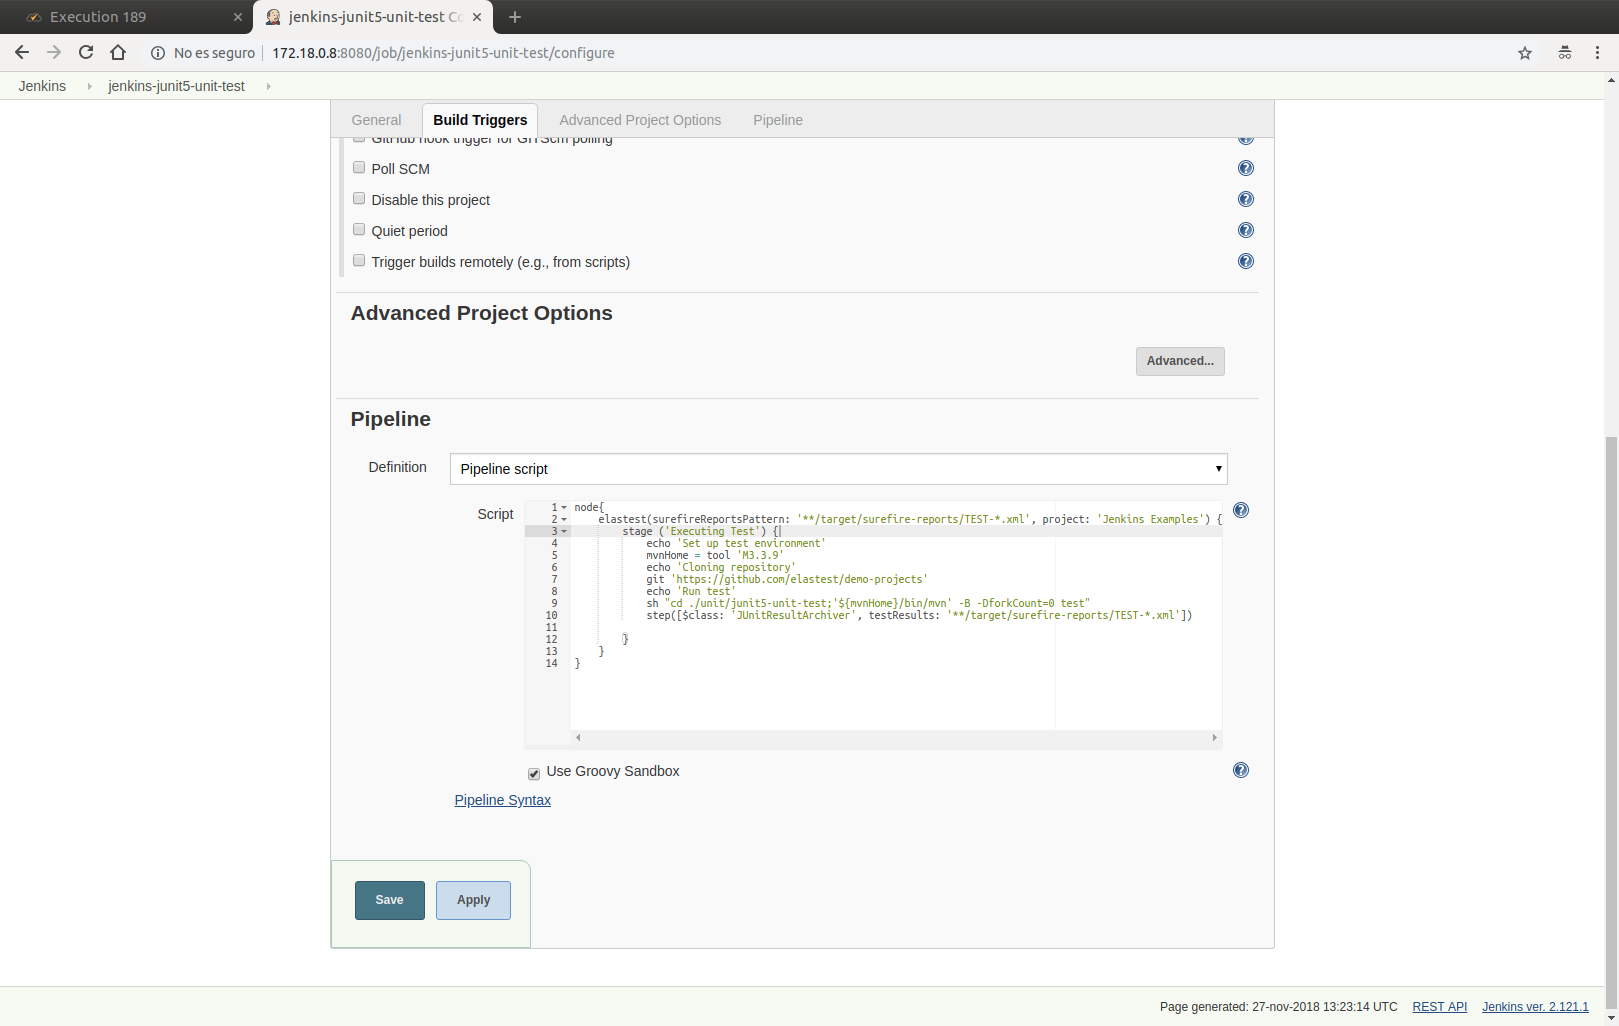
To create this Job must access Jenkins, create a Pipeline Job with the name you want (we'll use jenkins-junit5-unit-test), insert the code and save:
Once created, you can execute it as follows:
1. Click to "Build now" button
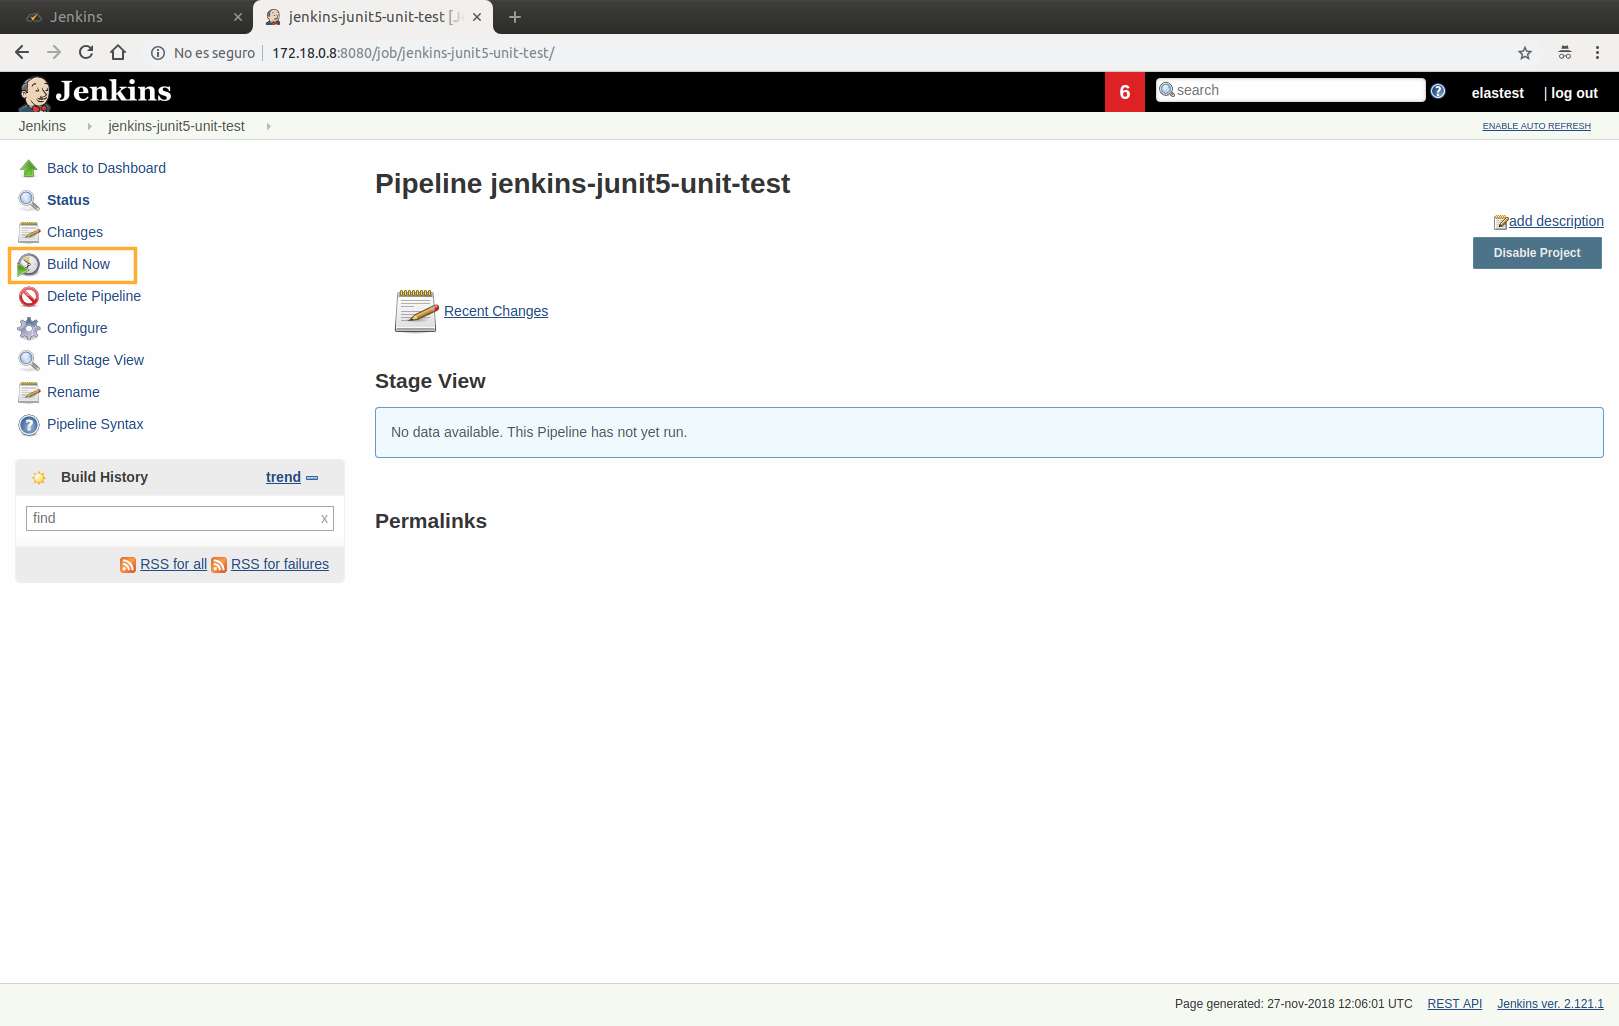
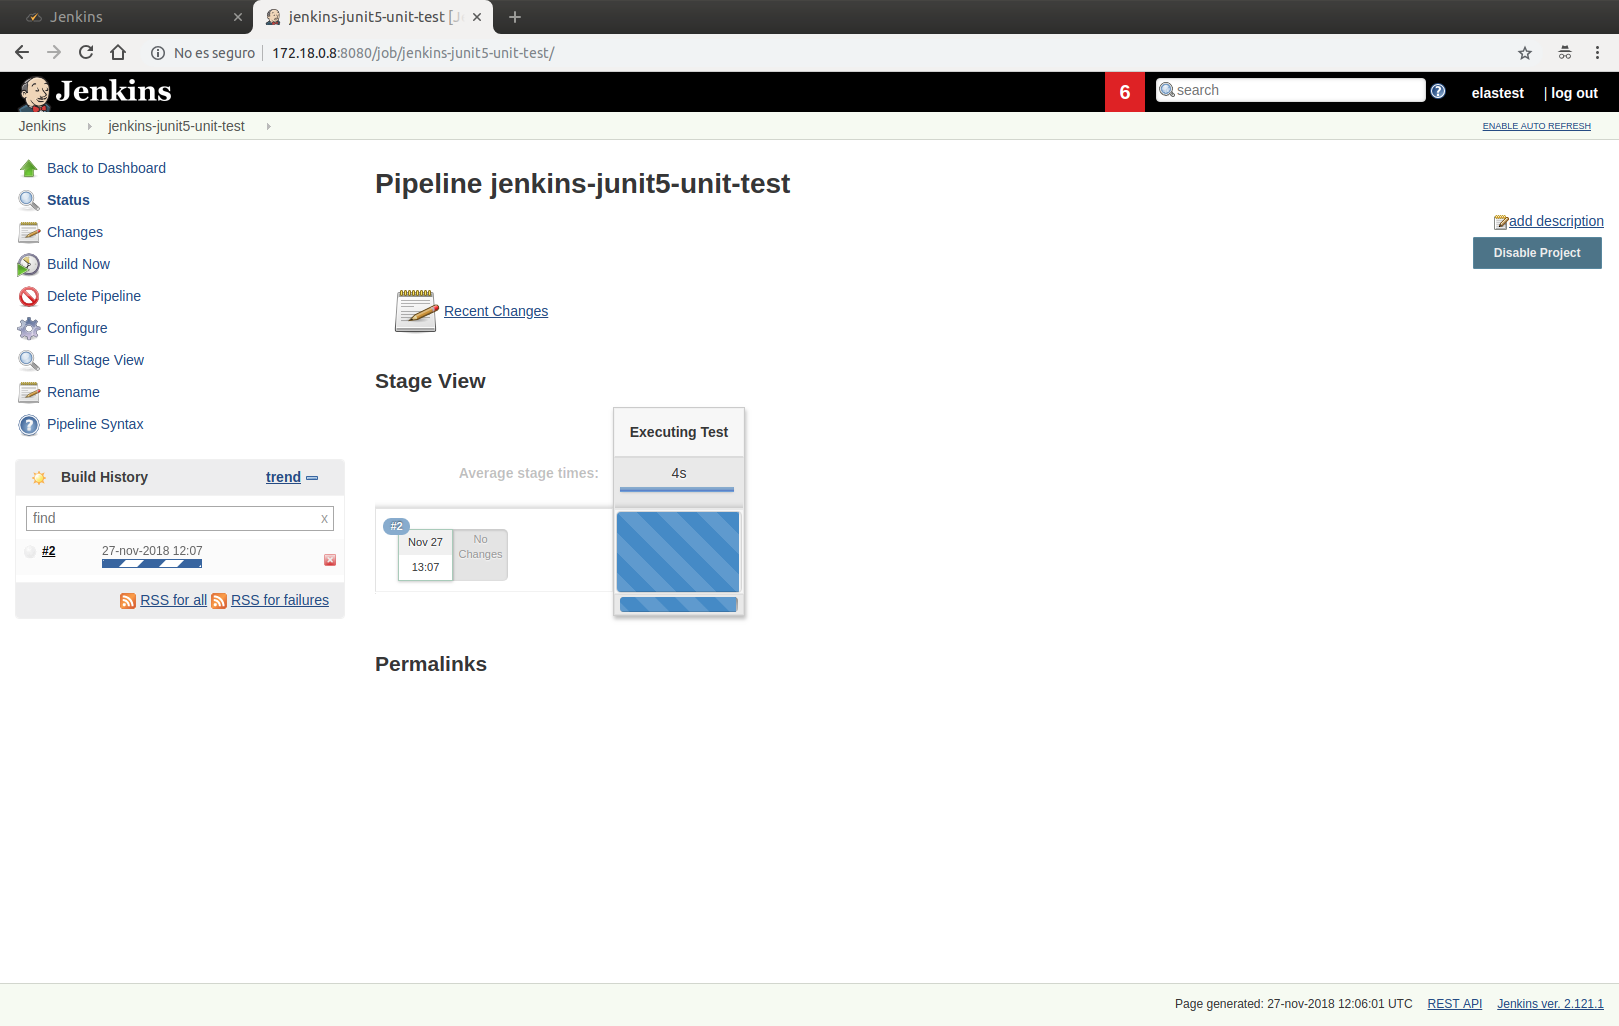
2. Running view
After pressing the button, you will see the job running on Jenkins:
Entering the build page, you will see the Open in ElasTest button, where you can see the execution page in ElasTest (If the button does not appear refresh the page, it may take a while).

ElasTest will have created a project called Jenkins Examples in Projects section, that will contain a TJob with the same name as Jenkins Job (jenkins-junit5-unit-test).

Navigating to this TJob you can see the current execution:
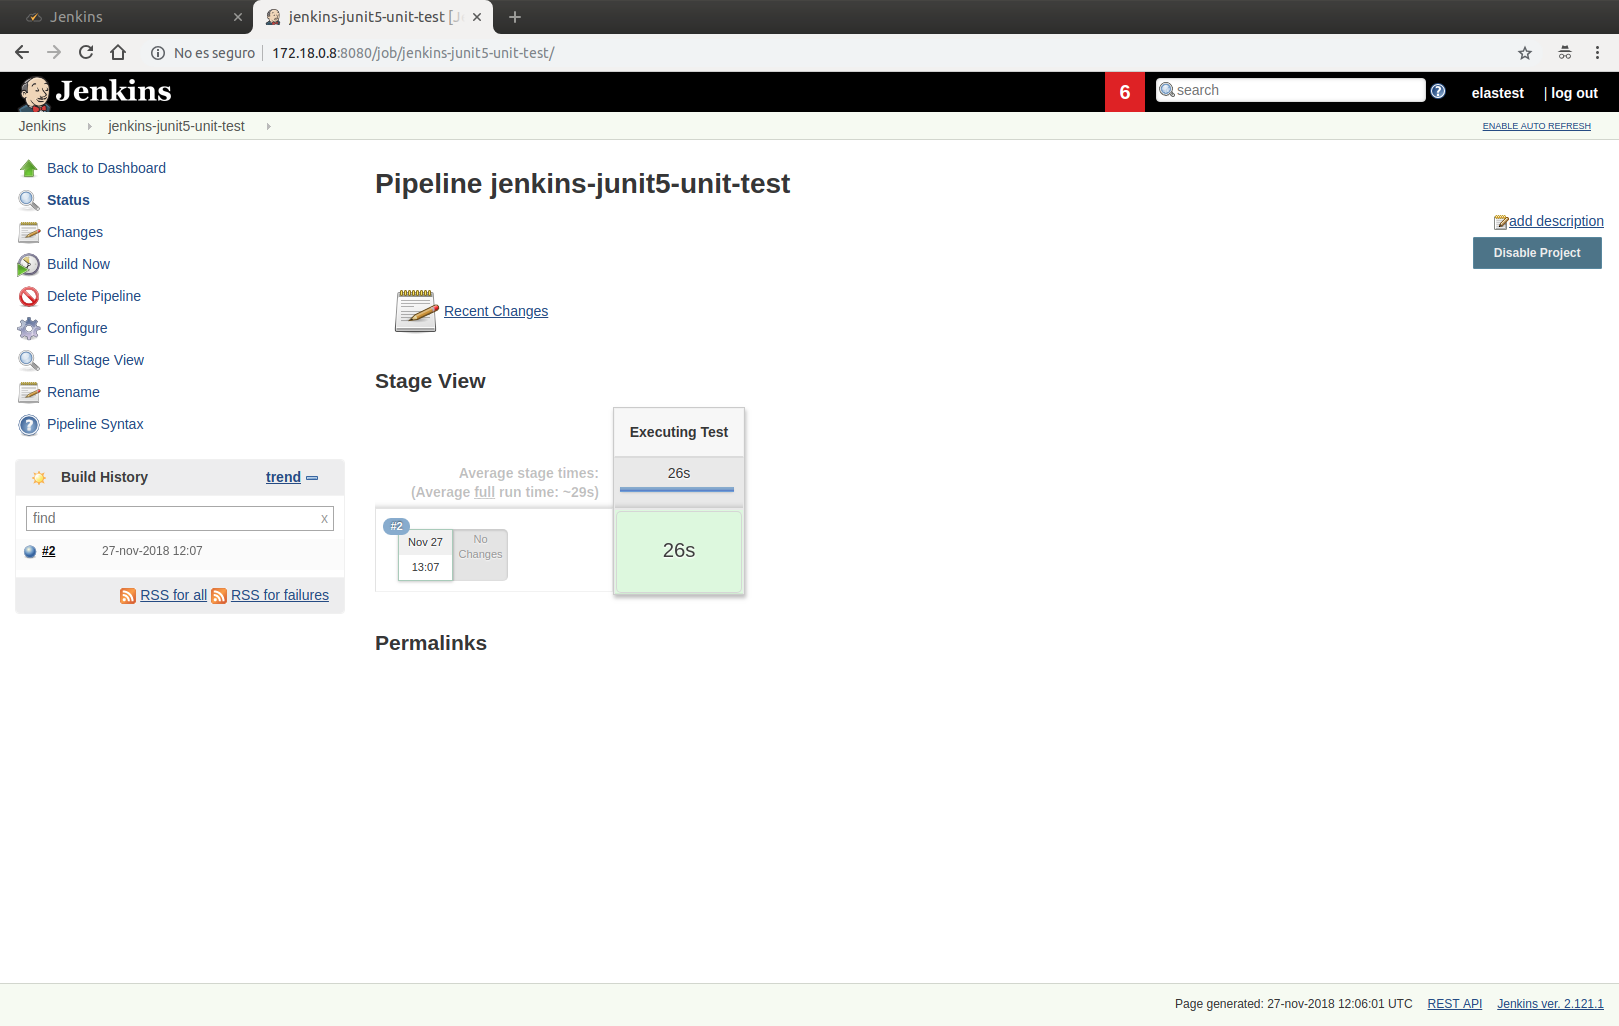
3. Results view
Once the execution is complete, you can view it in both Jenkins and ElasTest
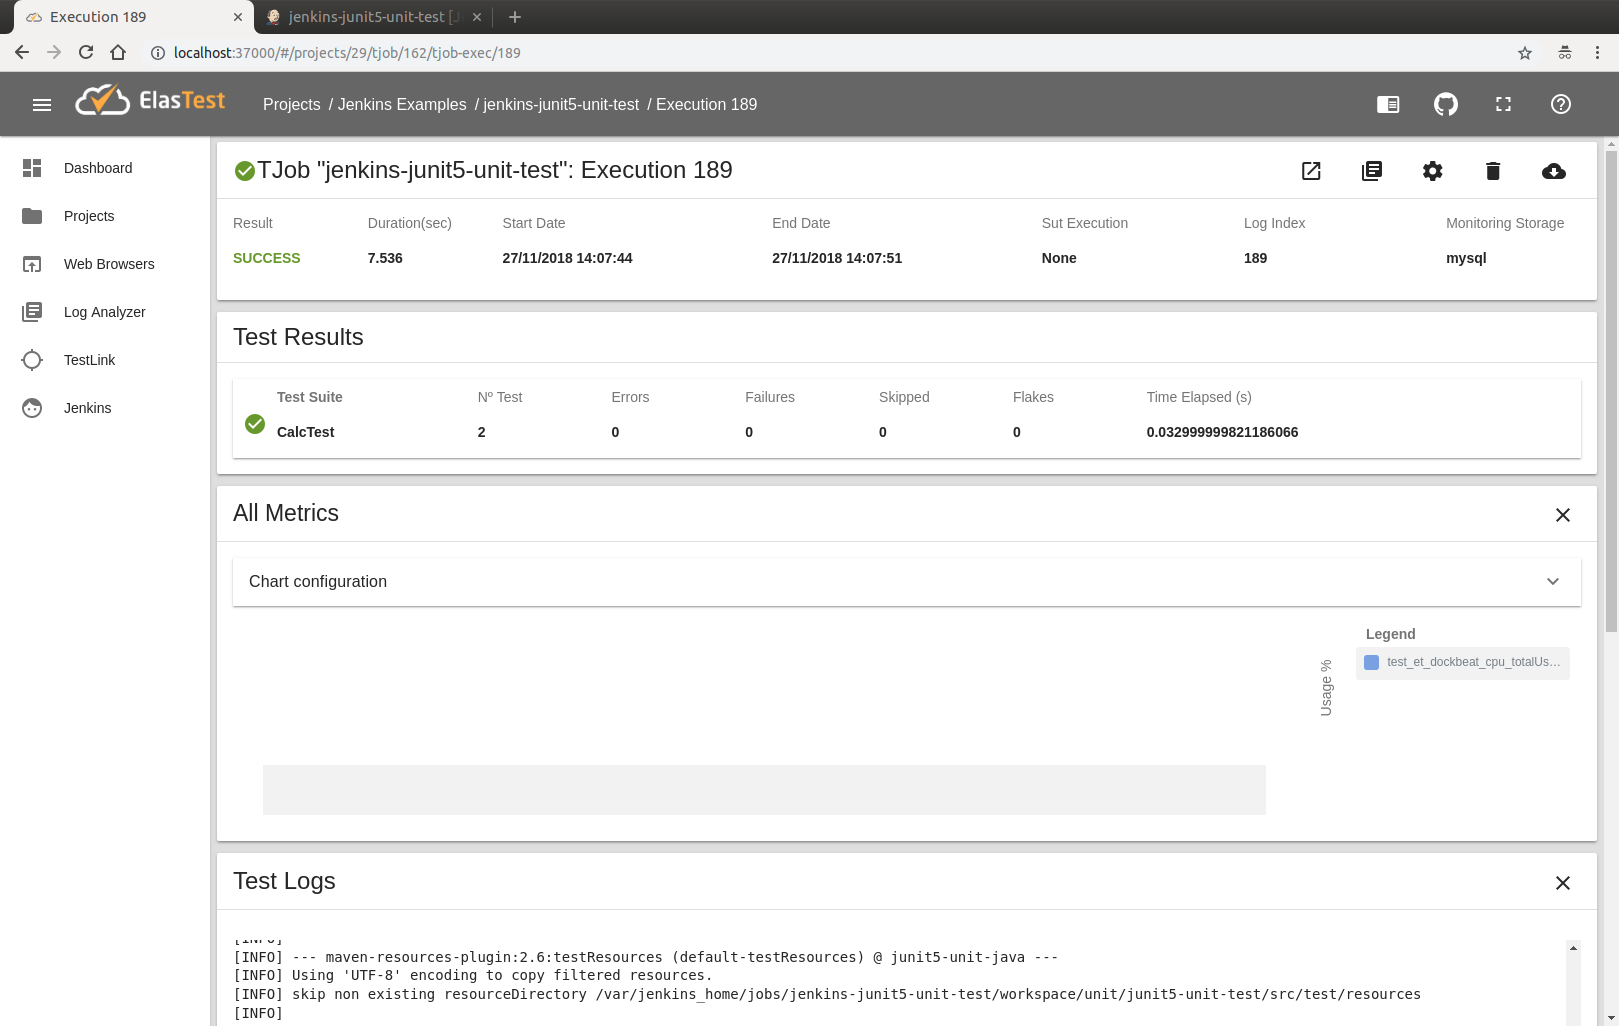
As can be seen in the last image, ElasTest shows different information, such as test results or logs. You can also see a card of metrics (All Metrics), but in this particular test is not sent any so it will appear empty.
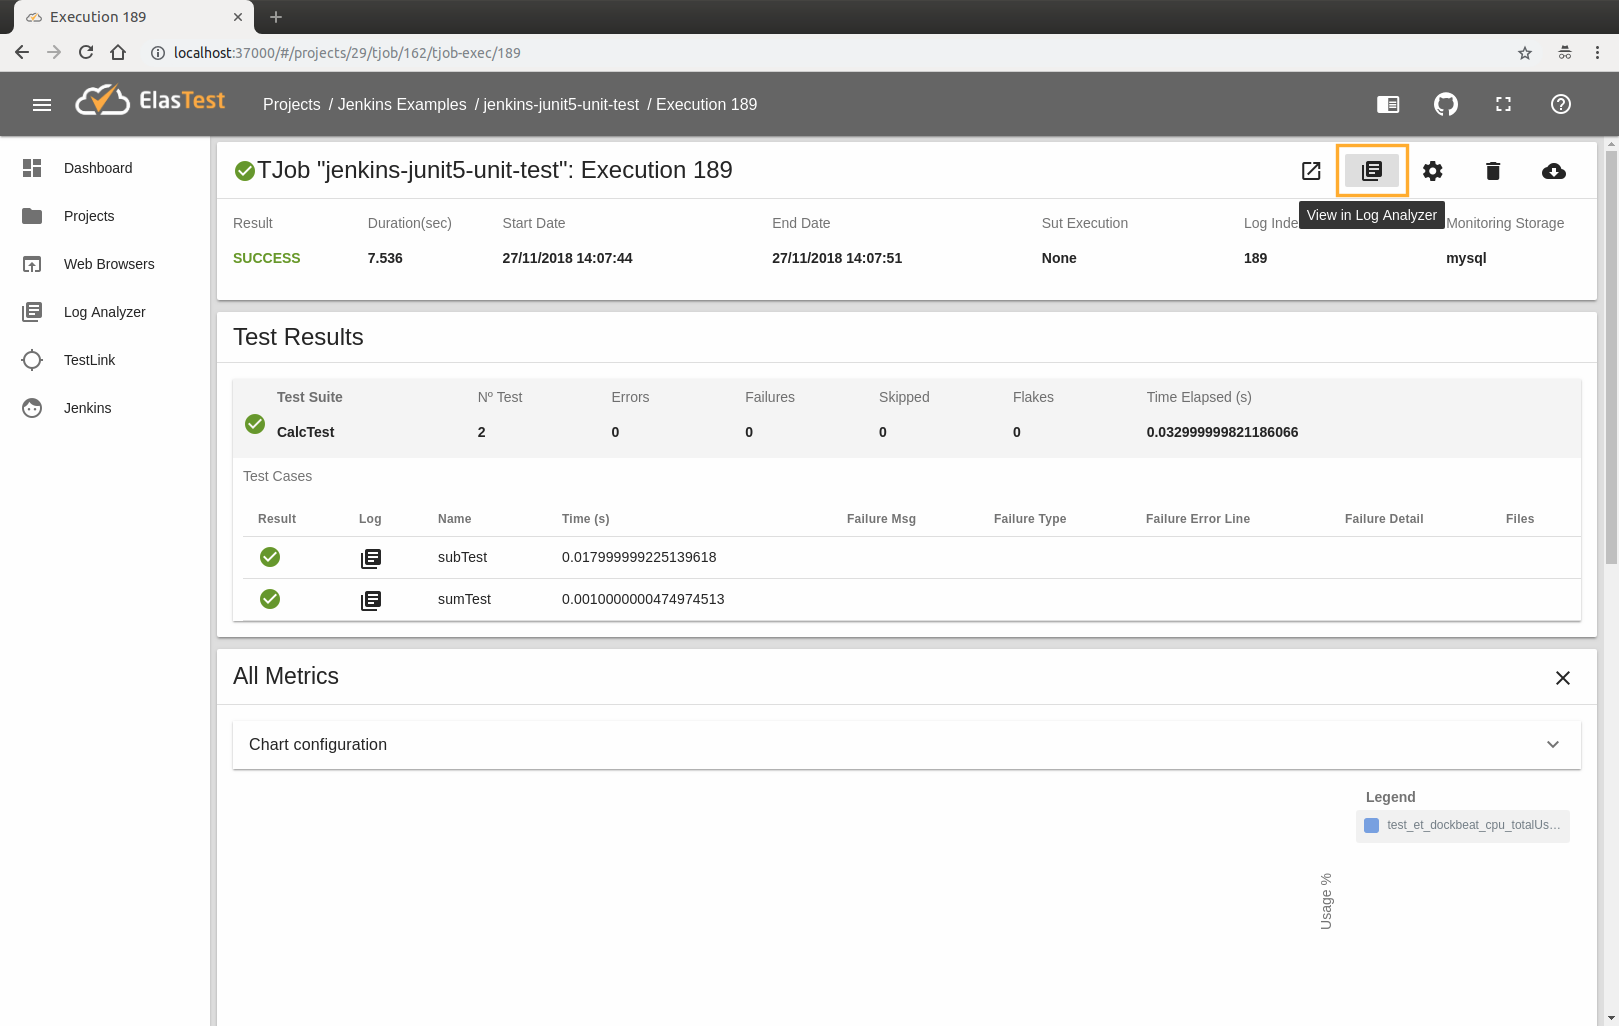
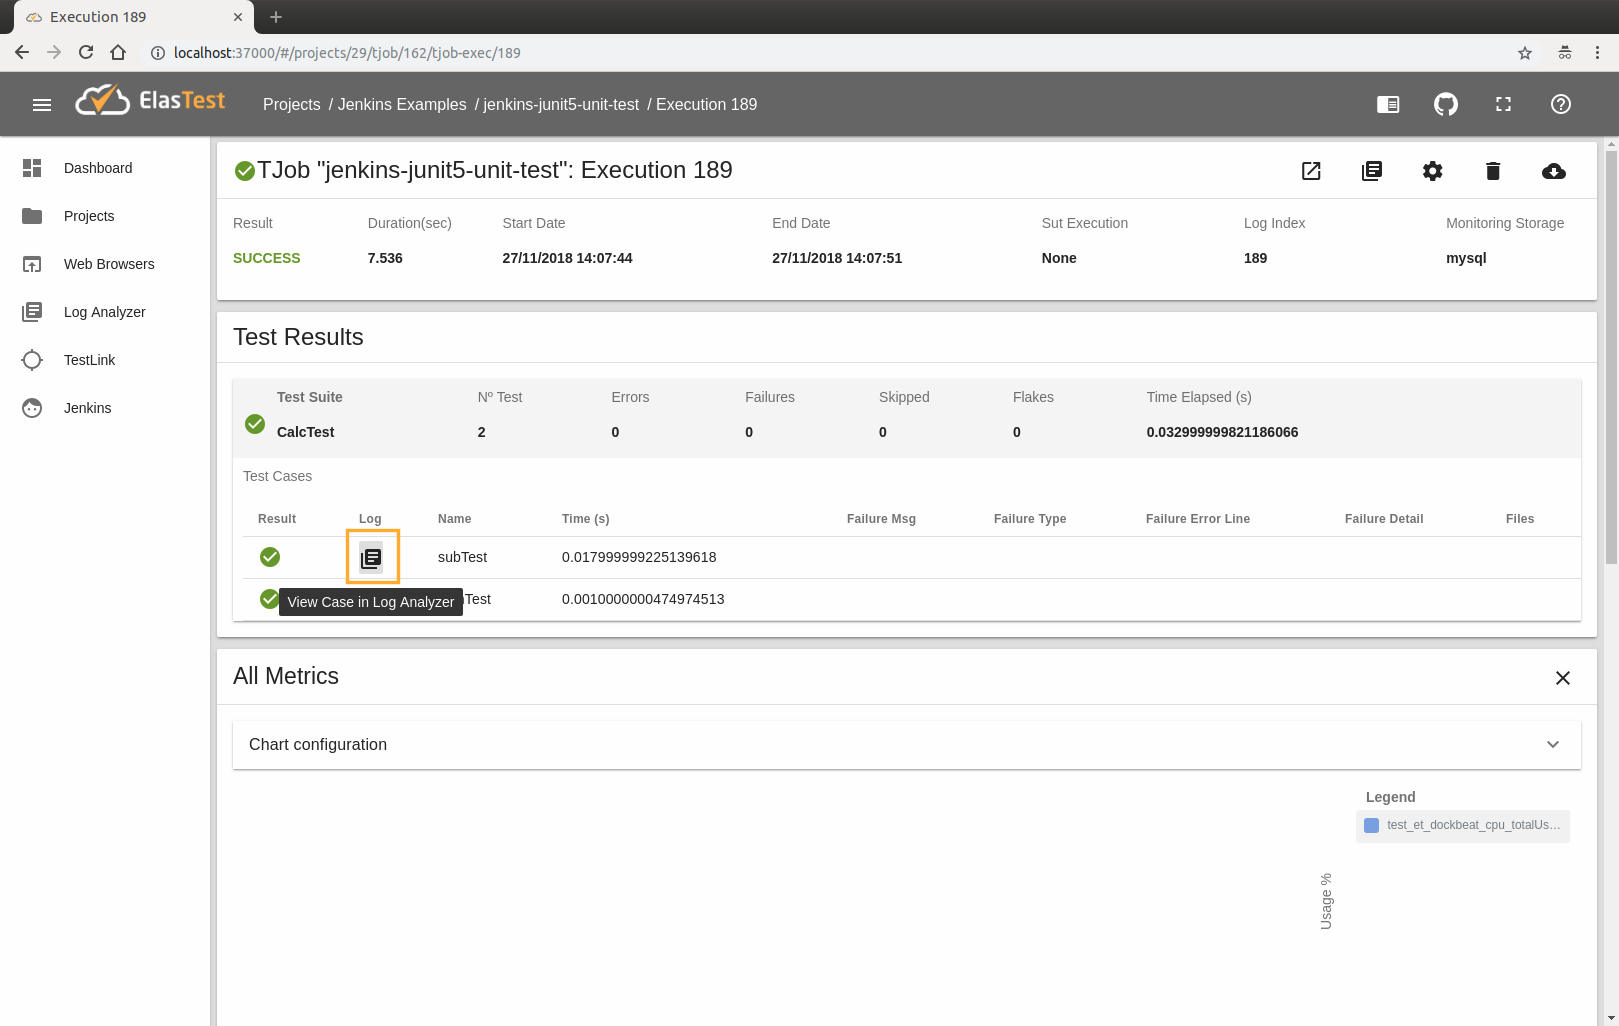
You can also see the logs of both the entire execution and each of the test cases in LogAnalyzer by clicking on the corresponding buttons:
Rest Test (End2End)
Bellow, you will find an example of pipeline where using the ElasTest plugin and implements severals configurations, a Sut is started and a test is executed using it. To configure this option, ElasTest provides the connection info using environment variables.
Here we will run our JUnit5 Rest Test provided by default in ElasTest, which makes use of a rest application as a SuT and has a single test that is responsible for making a GET request to that Sut. This test has been developed in Java using JUnit5. The code of this project is explained in detail here.
The Jenkins Pipeline code that will contain the Job is as follows:
node{
    elastest(surefireReportsPattern: '**/target/surefire-reports/TEST-*.xml', monitoring: true, project: 'Jenkins Examples') {
        stage ('Executing Test') {
            def sutImage = docker.image('elastest/demo-rest-java-test-sut')
            echo 'Start SUT'
            def sutContainerName = env.ET_SUT_CONTAINER_NAME;
            sutImage.withRun("--name ${sutContainerName} --network=elastest_elastest") { c ->
                echo "${c.id}"
                def sutNetwork = getFirstNetwork(sutContainerName)
                def sutIp = containerIp(sutContainerName,sutNetwork)
                sh 'docker run -e IP=' + sutIp + ' -e PORT=8080 --network=' + sutNetwork + ' elastest/etm-check-service-up'
                withEnv(['ET_SUT_HOST=' + sutIp]) {
                    echo 'Set up test environment'
                    mvnHome = tool 'M3.3.9'
                    echo 'Cloning repository'
                    git 'https://github.com/elastest/demo-projects'
                    echo 'Run test'
                    sh "cd ./rest/junit5-rest-test;'${mvnHome}/bin/mvn' -B -DforkCount=0 test"
                }
            }
        }
    }
}

def getFirstNetwork(containerName) {
    echo "Inside getFirstNetwork function"
    network = sh (
        script: "docker inspect " + containerName + " -f \"{{json .NetworkSettings.Networks}}\" | awk \"{sub(/:.*/,\\\"\\\")}1\" | awk \"{sub(/\\\"/,\\\"\\\")}1\" | awk \"{sub(/\\\"/,\\\"\\\")}1\" | awk \"{sub(/{/,\\\"\\\")}1\"",
        returnStdout: true
    ).trim()

    echo containerName+" Network = " + network;
    return network;
}

def containerIp(containerName, network) {
    echo "Inside containerIp function"
    containerIp = sh (
        script: "docker inspect --format=\"{{.NetworkSettings.Networks." + network + ".IPAddress}}\" "+ containerName,
        returnStdout: true
    ).trim()

    echo containerName+" IP = " + containerIp;
    return containerIp;
}
The example above can be split into the following sections:
- ElasTest plugin block with configuration : this block will contain all the steps that the test must follow, as well as the necessary configuration options.
node{
    elastest(surefireReportsPattern: '**/target/surefire-reports/TEST-*.xml', monitoring: true, project: 'Jenkins Examples') {
        .......
    }
}
- Sut configuration : The SUT must be started, passing the
${env.ET_SUT_CONTAINER_NAME}env variable (provided by ElasTest) as name of the container. This will allow ElasTest to receive logs and metrics from the Sut.
def sutImage = docker.image('elastest/demo-rest-java-test-sut')
echo 'Start SUT'
def sutContainerName = env.ET_SUT_CONTAINER_NAME;
sutImage.withRun("--name ${sutContainerName} --network=elastest_elastest") { c ->
- Wait for Sut : You have to obtain the Sut network and ip and run check image (elastest/etm-check-service-up) provided by ElasTest to wait for the Sut to be ready to be used. This step is not required, you can wait in other ways or not do it, but for this example we do it.
def sutNetwork = getFirstNetwork(sutContainerName)
def sutIp = containerIp(sutContainerName,sutNetwork)
sh 'docker run -e IP=' + sutIp + ' -e PORT=8080 --network=' + sutNetwork + ' elastest/etm-check-service-up'
- Test Execution : Finally, the tests should be executed to verify that the SUT is working correctly. Remember that you have to configure the Sut ip as an environment variable or pass it as a maven property so that the test knows where the SUT is.
....
withEnv(['ET_SUT_HOST=' + sutIp]) {
    echo 'Set up test environment'
    mvnHome = tool 'M3.3.9'
    echo 'Cloning repository'
    git 'https://github.com/elastest/demo-projects'
    echo 'Run test'
    sh "cd ./rest/junit5-rest-test;'${mvnHome}/bin/mvn' -B -DforkCount=0 test"
}
....
* This example will only work if the Maven tool is configured
WebBrowser Example
Bellow, you will find an example of pipeline where using the ElasTest plugin and implements severals configurations, a Sut is started and a test battery is executed using it, making use of WebBrowsers. To configure this option, ElasTest provides the connection info using environment variables.
Here we will run our JUnit5 Multi Browser Test provided by default in ElasTest, which makes use of a Spring Boot Application as a SuT that has two input fields (title and body) and a button to add them as a table row. Also has three test that are responsible for add rows to that Sut and verify that the added row has the expected content. This test has been developed in Java using JUnit5. The code of this project is explained in detail here.
The Jenkins Pipeline code that will contain the Job is as follows:
node{
    elastest(tss: ['EUS'], surefireReportsPattern: '**/target/surefire-reports/TEST-*.xml', monitoring: true, project: 'Jenkins Examples') {
        stage ('Executing Test') {
            echo 'Print env variables'
            sh 'env'
            def sutImage = docker.image('elastest/demo-web-java-test-sut')
            echo 'Start SUT'
            sutImage.withRun("--name ${env.ET_SUT_CONTAINER_NAME}") { c ->
                echo "${c.id}"
                def sutContainerName = env.ET_SUT_CONTAINER_NAME;
                def sutNetwork = getFirstNetwork(sutContainerName)
                def sutIp = containerIp(sutContainerName,sutNetwork)
                sh 'docker run -e IP=' + sutIp + ' -e PORT=8080 --network=' + sutNetwork + ' elastest/etm-check-service-up'
                withEnv(['ET_SUT_HOST=' + sutIp]) {
                    echo 'Set up test environment'
                    mvnHome = tool 'M3.3.9'
                    echo 'Cloning repository'
                    git 'https://github.com/elastest/demo-projects'
                    echo 'Run test'
                    sh "cd ./webapp/junit5-web-multiple-browsers-test/;'${mvnHome}/bin/mvn' -Dbrowser=chrome -DforkCount=0 test"
                }
            }

        }
    }
}

def getFirstNetwork(containerName) {
    echo "Inside getFirstNetwork function"
    network = sh (
        script: "docker inspect " + containerName + " -f \"{{json .NetworkSettings.Networks}}\" | awk \"{sub(/:.*/,\\\"\\\")}1\" | awk \"{sub(/\\\"/,\\\"\\\")}1\" | awk \"{sub(/\\\"/,\\\"\\\")}1\" | awk \"{sub(/{/,\\\"\\\")}1\"",
        returnStdout: true
    ).trim()

    echo containerName+" Network = " + network;
    return network;
}

def containerIp(containerName, network) {
    echo "Inside containerIp function"
    containerIp = sh (
        script: "docker inspect --format=\"{{.NetworkSettings.Networks." + network + ".IPAddress}}\" "+ containerName,
        returnStdout: true
    ).trim()

    echo containerName+" IP = " + containerIp;
    return containerIp;
}
The example above can be split into the following sections:
- ElasTest plugin block with configuration : this block will contain all the steps that the test must follow, as well as the necessary configuration options.
node{
    elastest(tss: ['EUS'], surefireReportsPattern: '**/target/surefire-reports/TEST-*.xml', monitoring: true, project: 'Jenkins Examples') {
        .......
    }
}
- Sut configuration : The SUT must be started, passing the
${env.ET_SUT_CONTAINER_NAME}env variable (provided by ElasTest) as name of the container. This will allow ElasTest to receive logs and metrics from the Sut.
def sutImage = docker.image('elastest/demo-web-java-test-sut')
echo 'Start SUT'
sutImage.withRun("--name ${env.ET_SUT_CONTAINER_NAME}") { c ->
- Wait for Sut : You have to obtain the Sut network and ip and run check image (elastest/etm-check-service-up) provided by ElasTest to wait for the Sut to be ready to be used.
def sutContainerName = env.ET_SUT_CONTAINER_NAME;
def sutNetwork = getFirstNetwork(sutContainerName)
def sutIp = containerIp(sutContainerName,sutNetwork)
sh 'docker run -e IP=' + sutIp + ' -e PORT=8080 --network=' + sutNetwork + ' elastest/etm-check-service-up'ocker run -e IP=' + sutIp + ' -e PORT=8080 --network=' + sutNetwork + ' elastest/etm-check-service-up'
- Test Execution : Finally, the tests should be executed to verify that the SUT is working correctly. Remember that you have to configure the Sut ip as an environment variable or pass it as a maven property so that the test and the browsers we are going to use know where the Sut is located.
....
withEnv(['ET_SUT_HOST=' + sutIp]) {
    echo 'Set up test environment'
    mvnHome = tool 'M3.3.9'
    echo 'Cloning repository'
    git 'https://github.com/elastest/demo-projects'
    echo 'Run test'
    sh "cd ./webapp/junit5-web-multiple-browsers-test/;'${mvnHome}/bin/mvn' -Dbrowser=chrome -DforkCount=0 test"
}
....
* This example will only work if the Maven tool is configured
ElasTest Plugin options
The installation of ElasTest, Jenkins and the collaboration between them, allows several configurations and offers the following options:
surefireReportsPatternwill contain the path where the xml files containing the test results are stored and which will be used by ElasTest to display the test information. We explain this in more detail here.projectis used to indicate the name of the ElasTest project where the TJob associated with Jenkins Job will be created. This field is optional and if it is not used, a project will be created with the same name as the Job.sut: allows you to select a Sut created in ElasTest against which to execute the job, indicating its id.tss: ['EUS']: is used to indicate to ElasTest that the job needs to use the EUS service to use a web browser.monitoring: used to send or not the Sut monitoring traces to Elastest.sutParams: ['PARAM_NAME': 'value']: used to send parameters to Sut.
Add ElasTest to your current Jenkins Jobs
We are preparing improvements and new features in the ElasTest Jenkins plugin for the next release.
1. Identify your test types:
- Unit
- Rest
- WebBrowsers
2. Modify your code:
Unit
For Unit Tests no modification is necessary to make it work but if you want ElasTest to be able to differentiate the logs of each of the test cases, it is necessary to add a start/finish log trace in each one. This is explained in detail here.
Rest
For Rest Tests no modification is necessary to make it work but if you want ElasTest to be able to differentiate the logs of each of the test cases, it is necessary to add a start/finish log trace in each one. This is explained in detail here.
WebBrowsers
You will need to make use of the ET_EUS_API environment variable provided by ElasTest to manage the browsers that the test will use. For example, if you use Selenium RemoteWebDriver, the code should be similar to the following:
String eusURL = System.getenv("ET_EUS_API");
WebDriver driver = new RemoteWebDriver(new URL(eusURL), caps);
3. Modify your Jenkinsfile:
For any type of test you need to make use of the step elastest() and enclose your code in it:
node{
    elastest() {
        .... YOUR CODE HERE ...
    }
}
If your tests generate xml report files (as JUnit does for example) you can use option surefireReportsPattern to indicate the path where they will be generated, so ElasTest can use them to get information:
node{
    elastest(surefireReportsPattern: '**/path/to/report/files/*.xml') {
        .... YOUR CODE HERE ...
    }
}
If you are using Unit Test this is all you need to modify. Let's see what changes are needed for the rest of the cases:
If you use a Sut
Depending on how you start the Sut, you will have to make different modifications:
- If your application is a Docker container started with
docker runyou will need to modify the command to give the container a name. This name will be the value of theET_SUT_CONTAINER_NAMEenvironment variable provided by ElasTest:
def sutImage = docker.image('your-image')
def sutContainerName = env.ET_SUT_CONTAINER_NAME;
sutImage.withRun("--name ${sutContainerName}") { c ->
    ....
}
- If your application is started with a
docker-composeyou will need to modify the command to set a project name. This name will be the value of theET_SUT_CONTAINER_NAMEenvironment variable provided by ElasTest:
sh "docker-compose -p ${env.ET_SUT_CONTAINER_NAME} up -d"
- If your application starts
directly from the code(like for example with java -jar command) or is started on anexternal machineyou don't have to do anything, but in this case the Sut logs will be part of the TJob logs.
Whether your application is a docker container or docker-compose, you can use the monitoring: true option so that ElasTest is able to receive metrics from the Sut.
elastest(monitoring: true, ...other options...) {
        ....
}
If you use a WebBrowsers
If you use WebBrowsers in your tests, it is necessary to use the option tss: ['EUS']:
elastest(tss: ['EUS'], ...other options...) {
        ....
}
Thanks to this option, ElasTest will be in charge of managing the browsers, recording the tests and associating the videos to them, as well as sending the logs of the browsers console. It also initializes environment variable ET_EUS_API that we mentioned in the step Modify your code and that you need to use in the code of your tests.
Setting max nº of builds
If in your Jenkins job you check the Discard old builds option and set a value for Max # of builds to keep, it will also be set in ElasTest, saving only the last N runs.

Jenkins deployment known issues
- If ElasTest and Jenkins are on different machines and Jenkins starts a Sut, it must have its public IP so that ElasTest browsers can access it.