TestLink
TestLink is the most widely used web-based test management tool and ElasTest provides integration with TestLink. With this tool you will can easily catch videos, logs, metrics to our manual execution of the test.
TestLink GUI is accessible from ElasTest. When ElasTest is started, a TestLink instance is also started to allow us the management of manual test.
Another feature that provides the integration between Elastest and TestLink is the possibility to access from the notes of a test case in TestLink to its execution in Elastest.
TestLink UI in ElasTest
The GUI provided by ElasTest to execute the manual test cases has the following sections:
- TestLink Home
- TestLink Projects
- TestLink Test Plan
- TestLink Test Plan Execution
- TestLink Test Plan Execution Results
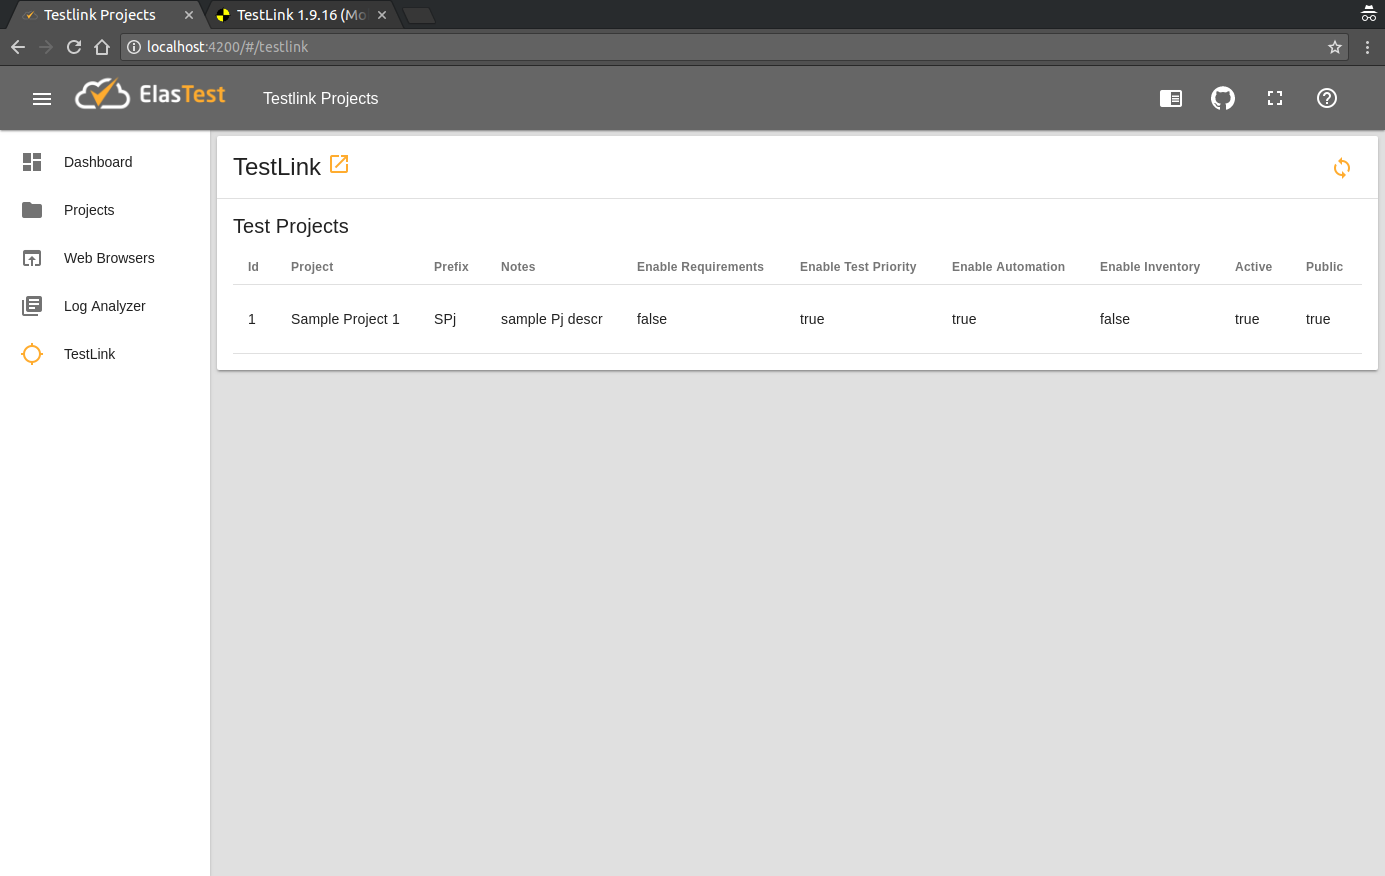
TestLink Home

Clicking TestLink button in left side menu of ElasTest will display the TestLink page.
Here, you can see all your projects created. Moreover, if you want to synchronize the displayed data in ElasTest with the TestLink data, you can use the synchronize button located on the top right.
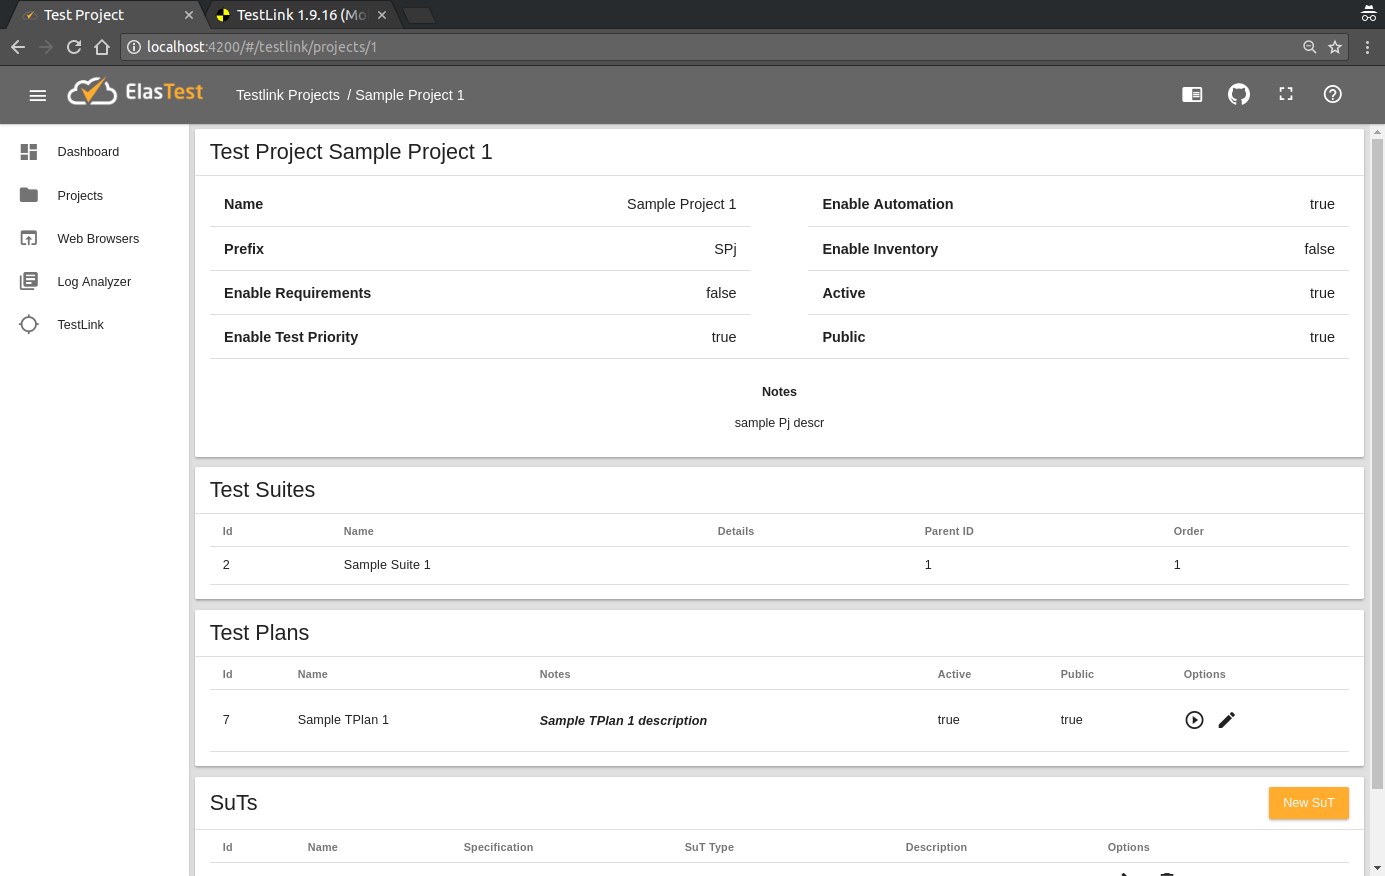
TestLink Project
This page will allow you to have an overview of all the components of the project, such as Test Suites, Test Plans and SuTs. In addition, you can run a test plan or create a new SuT.
TestLink Test Plan
On this page, not only can you see all the information about the Test Plan, but you can also edit it by clicking on the edit button located at the top.
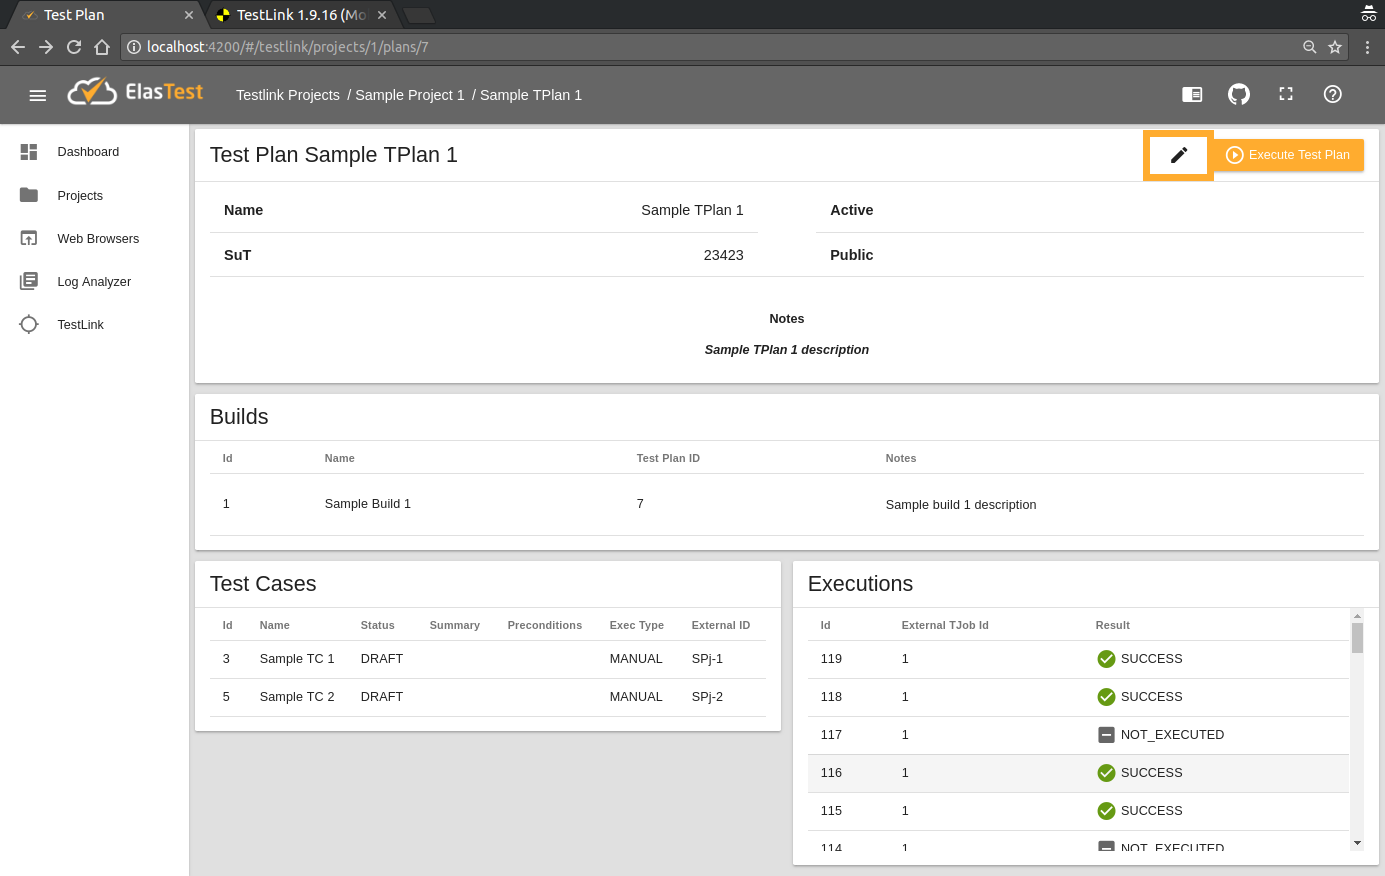
You can associate a SuT previously created in the editing page.

TestLink Test Plan Execution
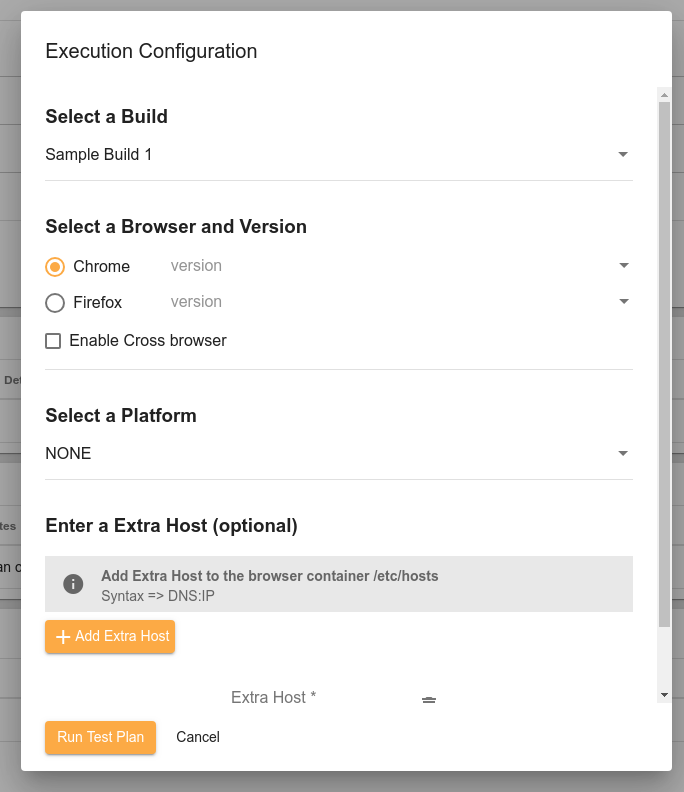
On the other hand, you can run the test plan clicking the "Execute Test Plan" button located on the top right. Immediately after clicking on the button, a modal will be displayed in which you can select the next configuration:
- Select Build to run the test.
- Select Browser and it's version.
- You can check
Enable Cross browserto use multiple browsers. View demo here
- You can check
- Select a Platform.
- Configure a hosts list to put them in the browser container /etc/hosts.
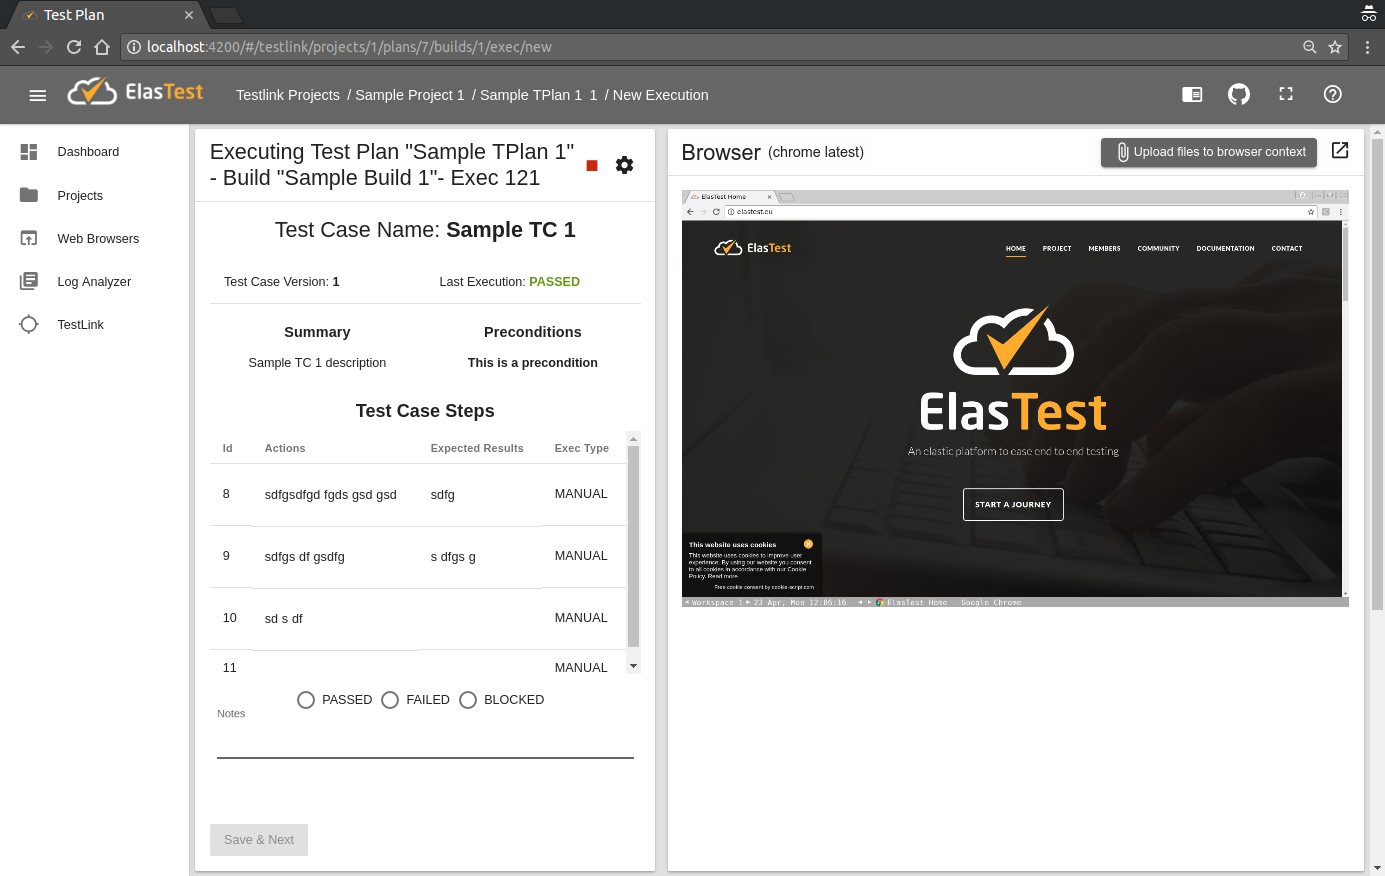
Once the configuration has been selected and the Run test plan button has been pressed, you must wait a few seconds until the browser loads. After that, you can see the Test Plan information on the left and a web browser on the right. On the bottom, you will can see all the logs of your test.
If you have associated a Sut to the Test Plan, you must wait until the Sut is ready to be used, then the browser will start as indicated in the previous paragraph and the url of the Sut will be loaded in that browser to test.
If you need to attach files you have on your machine to your browser, you can add them to the browser context by using the Upload files to browser context button. You can select more than one file at a time. Once uploaded to the browser context, you can find them in /home/ubuntu/et_shared_files.
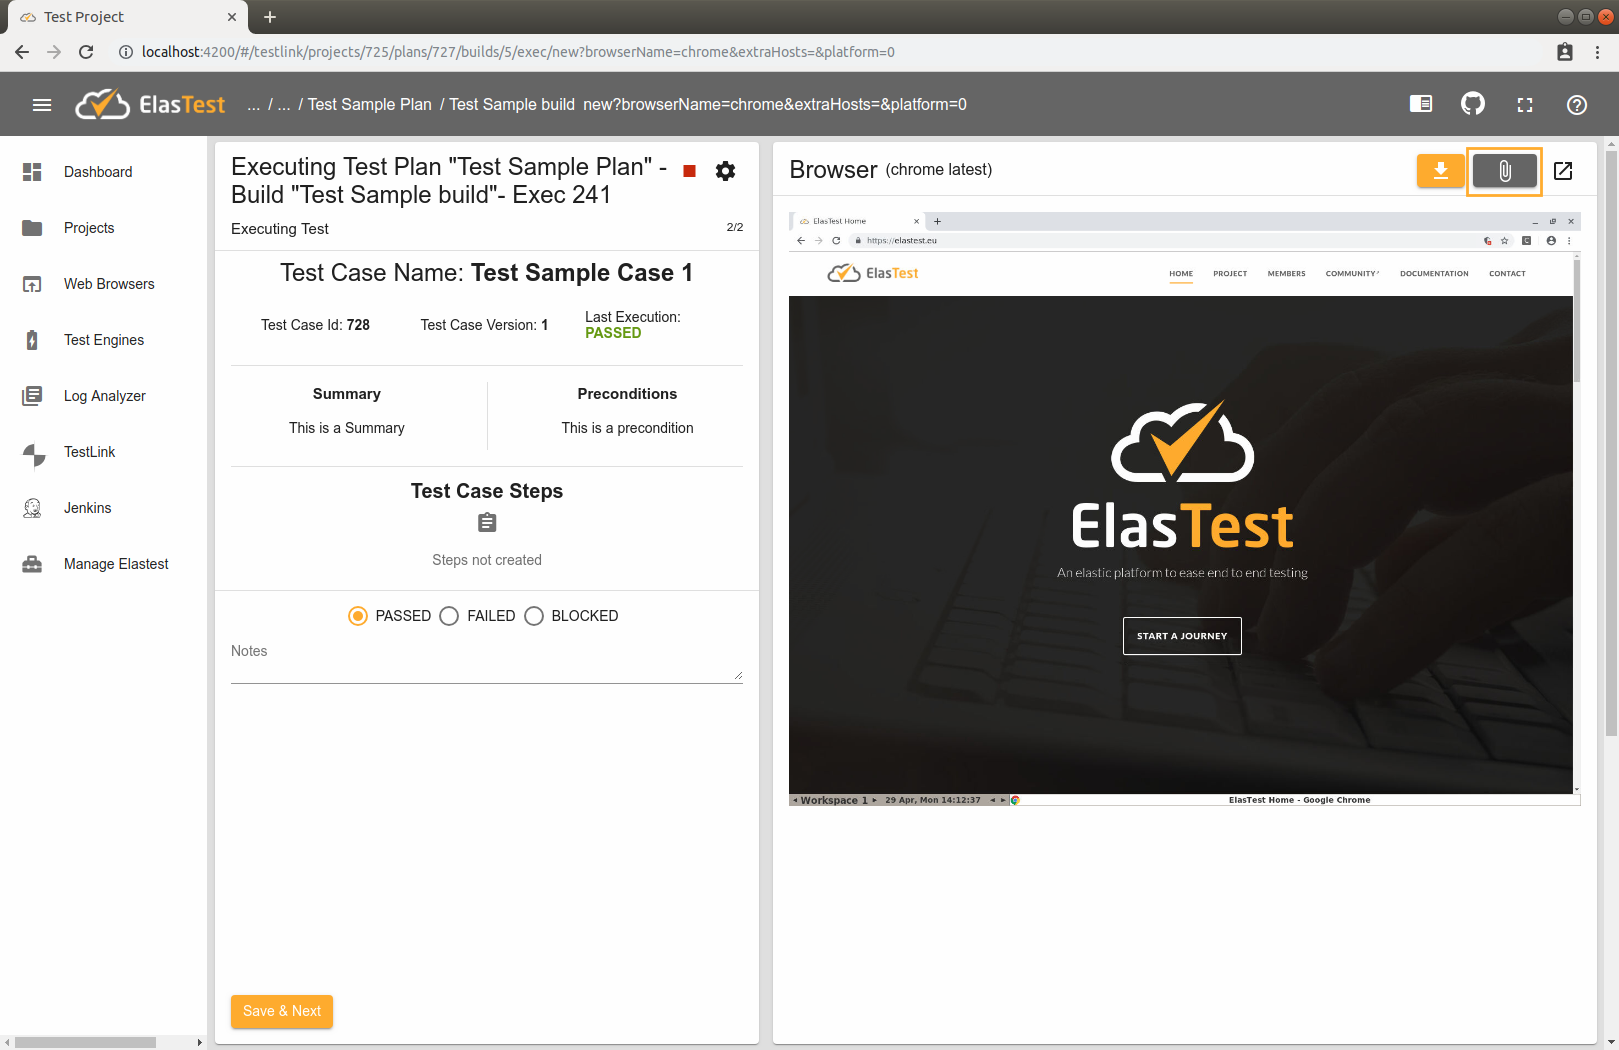
It is also possible to obtain a file from the context of the browser, making use of the Download file from browser context button.

Clicking will open a modal window where we can enter the full path where the file is within the context of the browser:
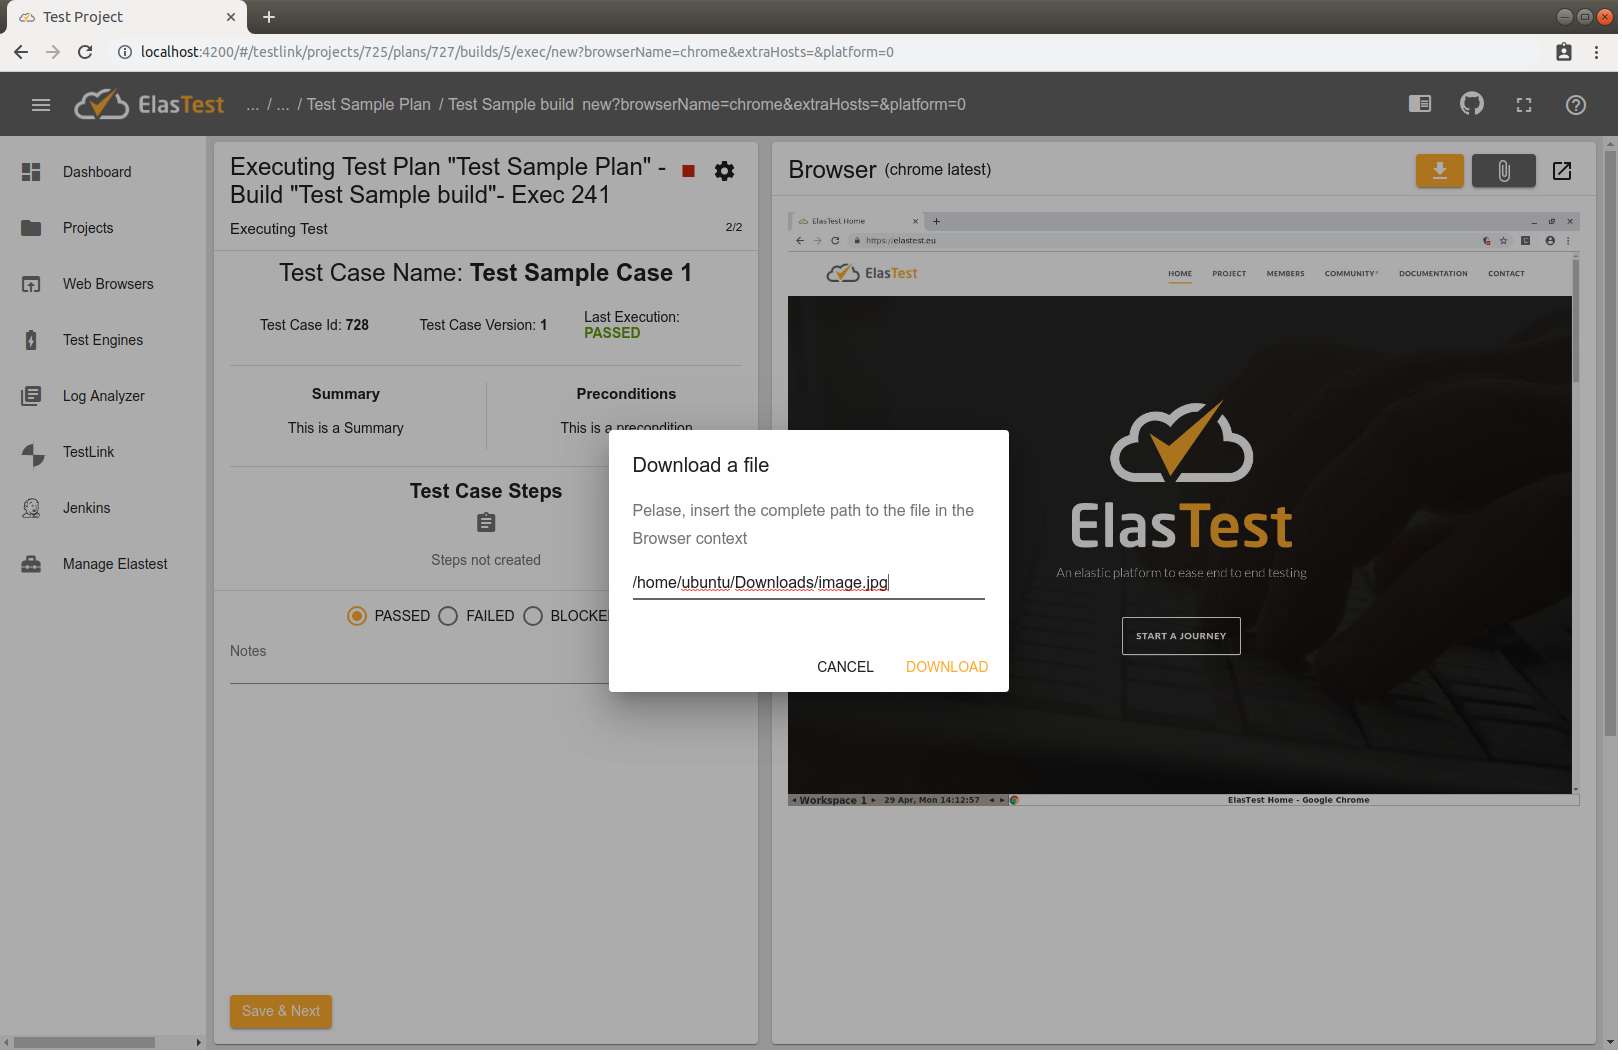
Once the route has been entered, just click on the DOWNLOAD button and the file will be downloaded.
To run Test Cases, you must fill the fields for each and click Save & Next button.
It's possible to pause an execution, and resume it later. In order to do this it is necessary to have executed at least one test case. From that moment on, a button to pause the execution will appear in the interface.

To resume it, navigate to Plan page and click to resume button:

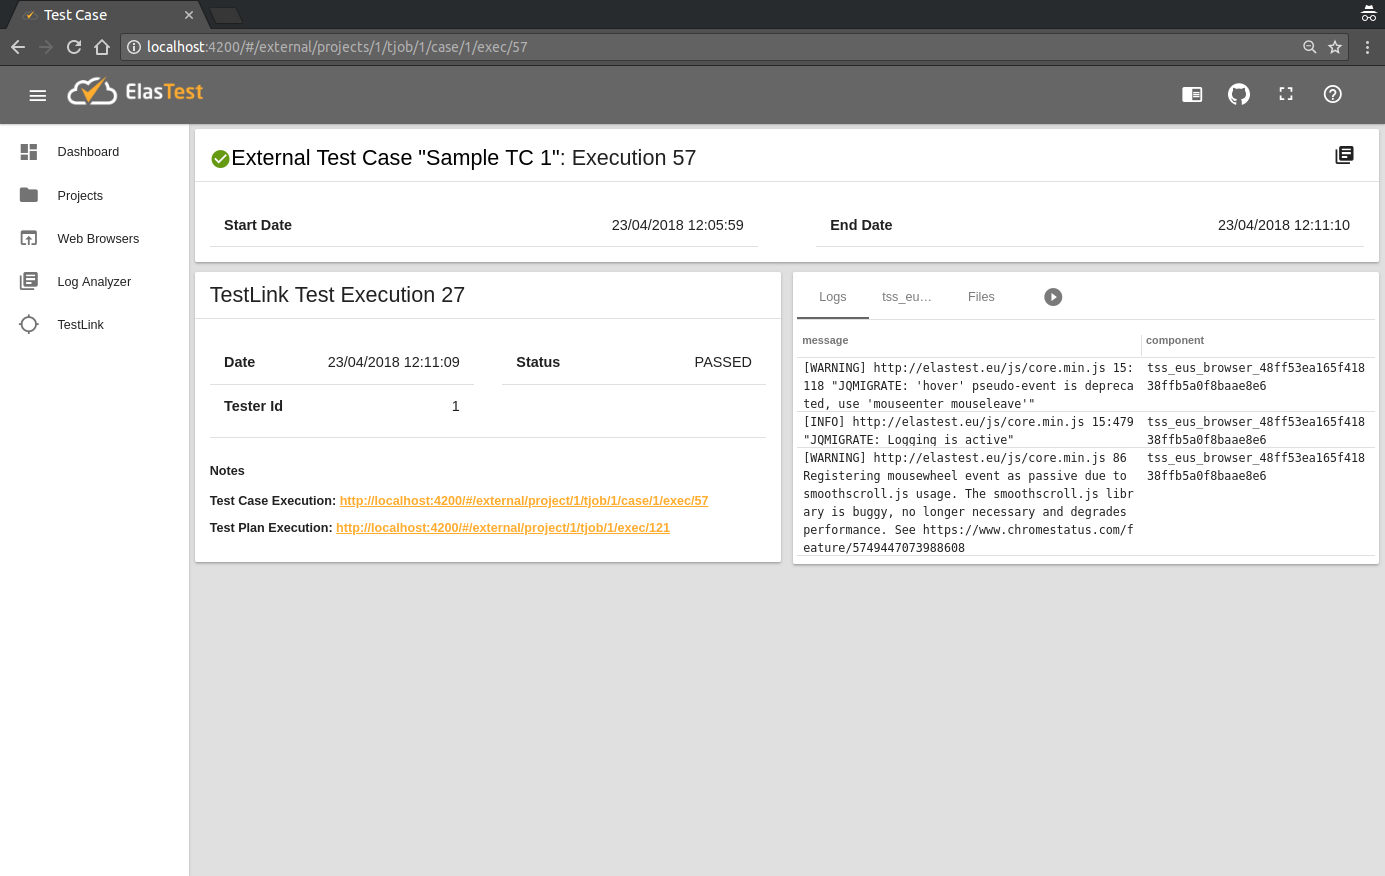
TestLink Test Plan Execution Result
Once you have completed all the test cases you will can see an overview of your test executed.
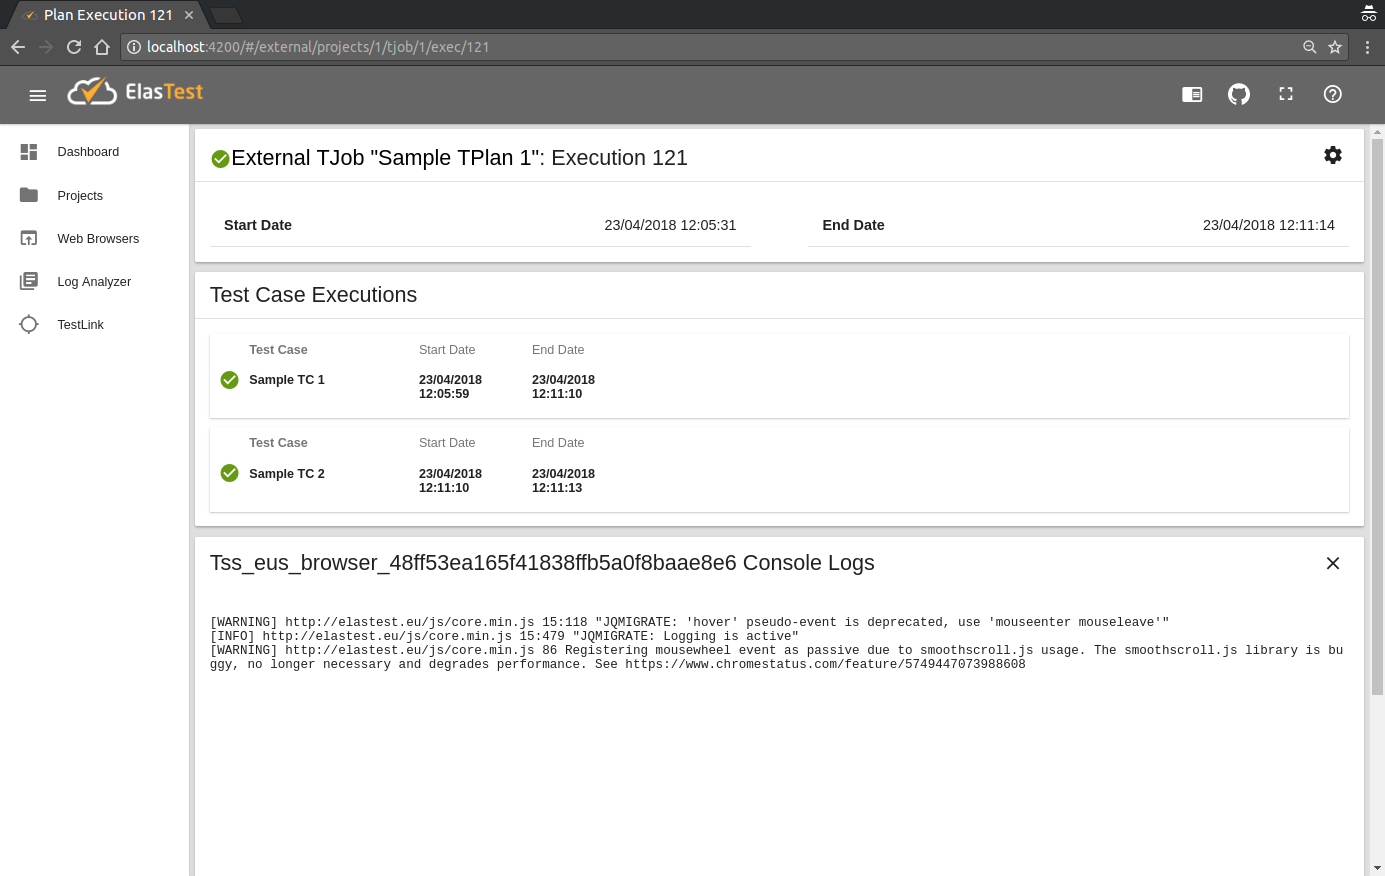
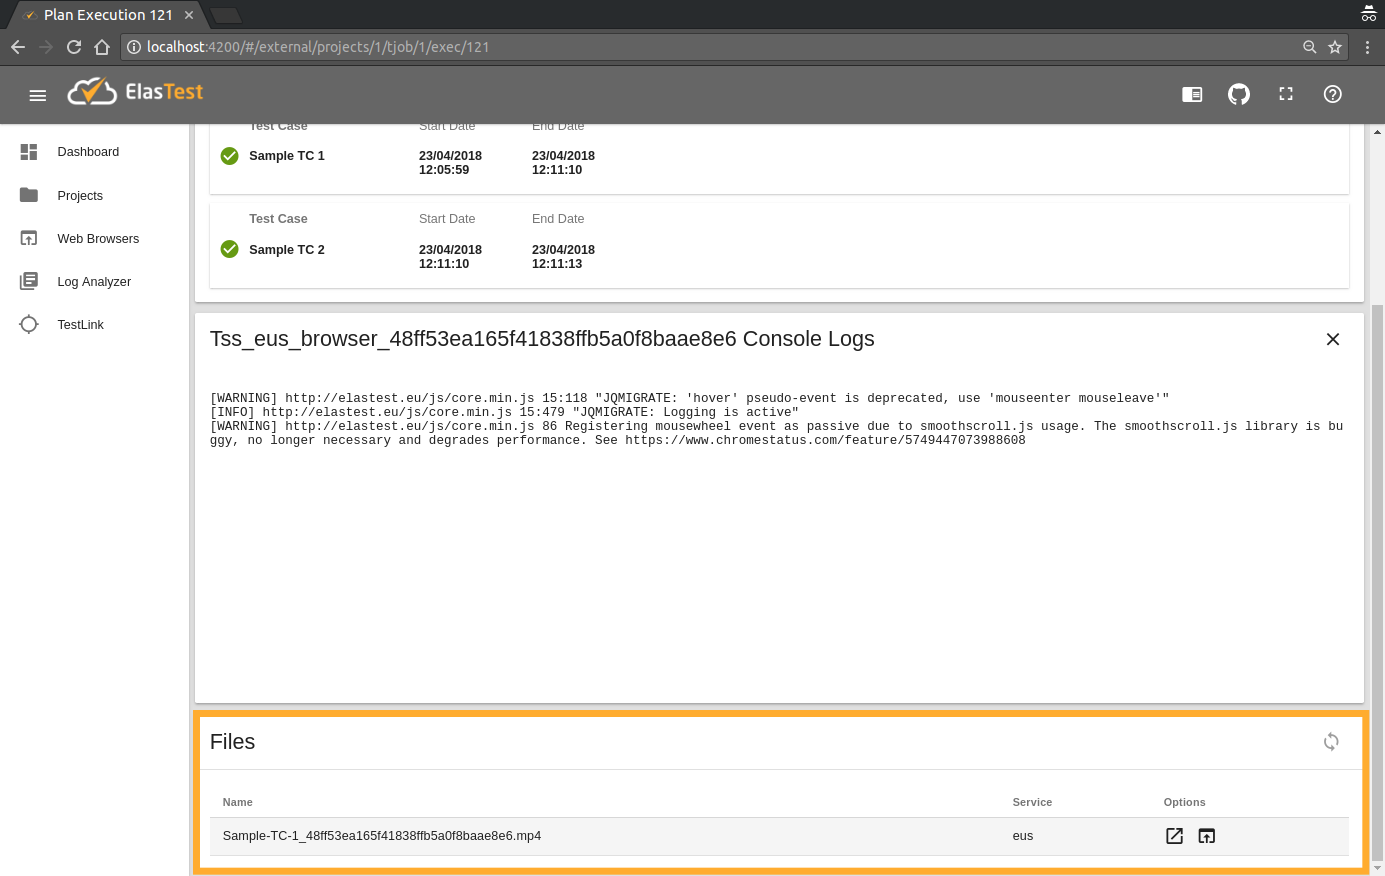
The video recordings of these are shown at the bottom of this page.
If you click on a Test Case Execution, you will see specific information about it, such as the start and end dates, its status, notes, records and video recordings.